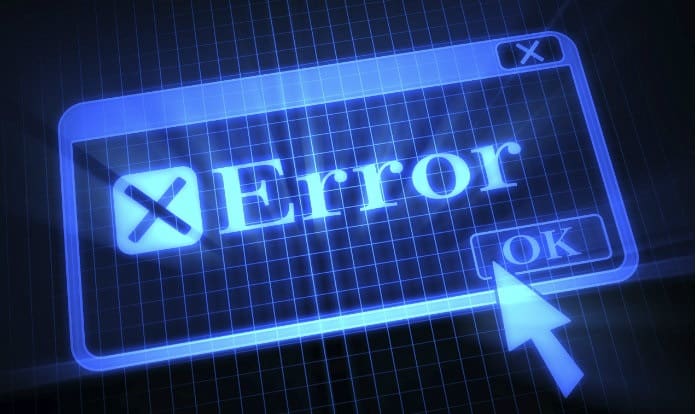
In Windows 10, the Printer Not Activated Error -30 message can prohibit you from printing to both your physical and virtual PDF printers. The solutions to this problem are listed below:
Fix: Printer Not Activated Error Code -30
User Account not having the authorization to print files, default printer not being set, and outdated or corrupted drivers are the most typical causes of the “Printer not enabled, error code -30” warning in Windows 10.
This error message can also appear when attempting to print to a PDF printer, although the error code will most likely be “Printer not activated error code -30 PDF or 20 PDF.” So take a glance to resolve this issue on Windows 10 computers.
1. Grant Full Control to User
Suppose the “Printer Not Activated Error Code -30” notice is caused by your User Account not having the requisite permissions to print. In that case, it can be resolved by granting your User Account the necessary privileges.
1. Right-tap on the File that you are unable to print, then click on Properties.
2. On the Properties screen, tap on the Security tab, then click on the Edit button.
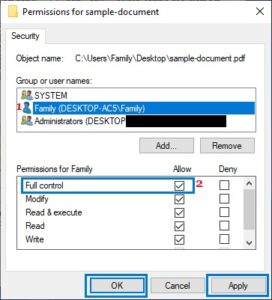
3. Tap your User Account on the next screen and grant Full Control to your User Account.
4. Tap on Apply & OK.
Now that you’ve full control over the file, you should be able to print the file without facing “Printer Not Activated Error code -30” or similar error messages.
2. Use Troubleshooter
The in-built Troubleshooter in Windows 10 can assist you in finding and fix printing issues on your computer.
1. Open Settings > click on Update & Security.
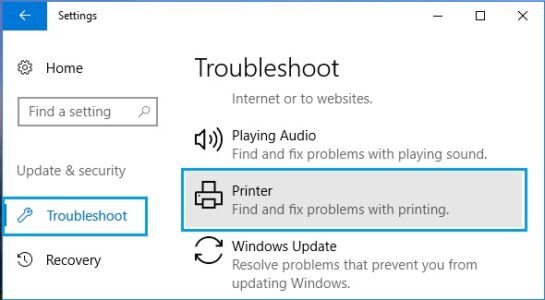
2. On the next screen, tap on Troubleshoot in the left pane. In the right pane, tap on Find and fix Problems with Printing.
3. After that, tap on the Run the Troubleshooter button.
4. As the Troubleshooter attempts to locate and resolve printing issues on your computer, follow the onscreen instructions.
ALSO SEE: How to delete a blank page in Microsoft Word
3. Set Your Printer as Default
In numerous cases, the “Printer Not Activated Error Code -30” message can be fixed by designating your Printer as the default printer on your computer.
1. Open Settings and tap on Devices.
2. On the Devices screen, tap on Printers & scanners in the left pane. In the right pane, tap on your Printer. Afterward, click on the Open Queue option.
3. After that, on the next screen, tap on the Printer > Set As Default Printer option in the drop-down menu.
You should now be able to print without seeing Another Printer is using this printer prompt.
4. Update Printer Driver
In general, Windows 10 should update all device drivers on your computer automatically. However, this is unlikely to happen all of the time.
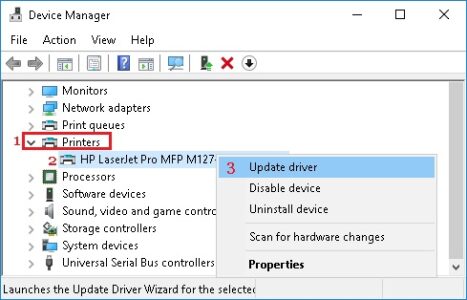
1. Right-click on the Start button and tap on Device Manager.
2. On the Device Manager screen, right-tap on your Printer, then click on Update Driver.
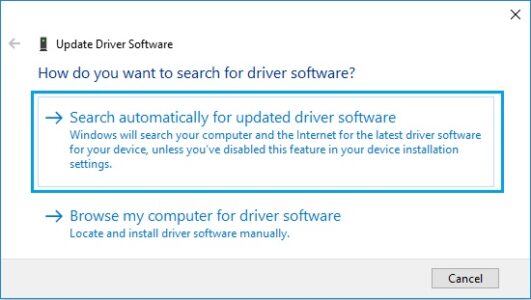
3. Now, on the next screen, click on Search Automatically for the updated driver software option.
4. Afterward, allow Windows to search for the updated printer driver & install it on your computer.


